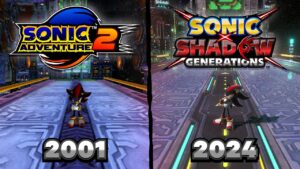
SEGA’s flagship character, Sonic the Hedgehog, returned in October 2024 with Sonic × Shadow Generations, a powerful new entry in the franchise. The game remasters 2011’s Sonic Generations for modern platforms while adding an all-new story campaign titled Shadow Generations, starring the fan-favorite Shadow the Hedgehog. The package offers a 2-in-1 experience, combining Classic Sonic’s 2D platforming legacy with Shadow’s darker, high-speed narrative.
With Shadow’s immense popularity—especially overseas—the game quickly became a major success, selling over one million copies worldwide on launch day and surpassing two million within its first three months. In this feature, SEGA lifts the curtain on the technical artistry behind the game, showcasing how tools like Maya were used for character modeling, motion creation, and dynamic event scenes. While just a glimpse into the broader development process, the behind-the-scenes look reveals the level of polish and innovation that brought these iconic characters and cinematic moments to life.


Interview Participants from SEGA
(from right to left in the photo):
- Keiichi Madate – Senior Art Director
- Shugo Gōda – Lead Character Animator
- Kōichi Shibuya – Lead Cutscene Artist
- Shinji Matsuura – Lead Character Artist


Scripting to Support Efficient Character Creation

First, the character creation team pooled their ideas and worked on a character design based on the theme of a dark hero. Shadow, the protagonist of Shadow Generations, possesses a power called “Doom Power” that allows him to sprout wings and transform.
Shadow’s facial rig is set up with parameters corresponding to different emotions, allowing the team to visually confirm how much each emotion is blended with another. Using driven keys and expressions to link attributes like this is also possible in Maya, and with some basic knowledge, creating such a UI is relatively straightforward.


The in-house tool “Needle Viewer” allows developers to preview and adjust models directly within the Maya viewport, simulating how they would appear in the actual game. By capturing in-game usage scenarios (as shown on the left) and loading them into Maya, the tool recreates the same environment, enabling edits in a state closely resembling the final output.

Next, a dedicated shader was created to express a mass of writhing spheres in a randomized way. This was used for the boss character Biolizard. The shader’s channels were set as follows:
- R = size of the bulge
- G = speed of expansion and contraction
- B = time offset
By incorporating Maya script-based randomization into these parameters, artists could achieve dynamic, randomized animations with a single button press. This kind of scripting is particularly useful for handling large volumes of objects.
“Since the particles all use the same model, the vertex indices are fixed. We simply select appropriate vertex indices, then apply randomized colors using shell selection through a simple command,” explains Lead Character Artist Shinji Matsuura.


ARK Missile: To depict the gimmick of the massive missile’s armor peeling off in three stages, the polygon mesh was split to create the armor break effect. Maya’s crack feature was primarily used for rough fragmentation, with finer details adjusted manually. The structure involves a large number of scattered parts, and for each fragment, the center of the object was calculated, then a bone (joint) was individually placed pointing toward that center.

Efforts in workflow optimization and tool customization for motion production

Through the development of the Sonic series and other titles, SEGA’s in-house technical artists (TAs) and script-savvy animators have continuously customized Maya’s animation-related tools. Improvements include enhancements to the graph editor UI, toggleable display modes, numerical input support in the style of Softimage, and automation for curve operations such as smoothing and keyframe convergence or reduction. These upgrades have significantly boosted workflow efficiency. Additionally, a dedicated launcher is used to load animation tools, enabling Maya to start with motion tools already active. For remote work environments, tools can be downloaded locally to ensure smooth access.
The rig design for Shadow in Sonic x Shadow Generations reuses the framework from Sonic Frontiers (2022). The arms, legs, and elbows have been enhanced for better scaling and mobility, allowing for more impactful and exaggerated expressions during actions like punching. For facial control, the system was refined to make loading preset poses from the picker more accessible, and it includes a dynamic adjustment mechanism that orients the character’s mouth toward the camera (handled via shader control in the actual game).
The picker interface was designed using Qt Designer, enabling an intuitive UI that allows animators to work efficiently. It integrates a range of versatile features such as IK/FK switching, mirroring, and global transformation toggles, all of which contribute to significantly improving workflow efficiency.

For characters other than the main cast, the team used the modular rigging tool mGear. This allowed them to create rigs for a wide variety of non-humanoid enemy characters. Even without dedicated riggers, the animator-led team could generate rigs automatically by setting up guides. Since mGear comes with built-in features like combined spline IK and FK controls, it was especially effective for rigging tentacle-like enemy characters that required numerous rigs.


The team used Dream Wall Picker as their picker tool. By integrating it with mGear via custom scripts, they were able to create secondary motion controllers. This allowed them to import rigs, attach them to characters, and simulate physics-based secondary motion—such as hair—directly in Maya. The simulated motion could then be baked and exported, enabling efficient handling of complex animations involving dynamic, flowing elements.
Two standout features of this title are the “Distortion Space” effect and “Doom Power.” The former was built and tested using a combination of Unreal Engine and Houdini, enabling a unique and immersive visual style (further detailed in the event section). Enemies imbued with Doom Power are designed with a soft, flexible, almost amorphous texture. Their animations were hand-crafted to convey supple, fluid movements, using exaggerated scaling techniques to deliver impactful, dynamic action.


The motion team also handled some of the in-game cutscenes, although there were no clearly defined storyboards. Much of the creative control was left to the discretion of the motion animators. During the planning phase, layout directions were provided in written form, but the specifics of camera work and direction were determined on-site during production. Additionally, to ensure a seamless transition between in-game events and gameplay, the team collaborated closely with the event team to enhance immersion.
For example, in the missile destruction scene, Shadow’s unique ability, “Time Stop,” is used to create a visually striking moment. While debris floats frozen in the air, Shadow pushes through it and ultimately kicks the missile. As time resumes, the built-up energy is unleashed in a dramatic explosion. Since the Sonic series emphasizes speed and acrobatic movement, a strong tradition of hand-keyed animation has taken root. This style, passed down from senior animators, relies heavily on silhouette clarity and dynamic posing. Motion libraries and reference materials help convey and preserve the series’ distinct sense of coolness across generations.

In-Game Event: “Distortion Space Entry” Production
One of the key in-game event features in this title is the “Distortion Space Entry” sequence. When entering the realm controlled by Shadow’s arch-nemesis, Black Doom, players are forcibly transitioned into a surreal space where gravity reverses and physical laws break down. To maintain immersion, the game transitions seamlessly into this event without a fade-to-black, allowing players to move directly into the new stage.
This sequence appears in three specific areas, each designed to deliver a striking visual surprise while also supporting the narrative. To avoid disrupting gameplay pacing, each cutscene is constrained to a duration of roughly 15 to 25 seconds. Achieving that balance of visual impact, storytelling, and seamless integration posed a creative challenge for the team.
“We started by asking ourselves, ‘What exactly is a Distortion Space?’ and began defining it as a team,” said Shibuya. “We wanted to keep the visuals stylish and intense, so we exchanged ideas and gave each of the three locations—ARK, Rail Canyon, and the city—distinctive characteristics.”
In the ARK sequence, which serves as the first “Distortion Space Entry” event, the camera work is intentionally restrained to clearly convey the stage transition to the player. Abrupt cuts could break immersion, so the in-game camera is kept consistent during the transition. As the corridor collapses, a kaleidoscope-like world unfolds, and Shadow is suddenly launched into the air.
A close-up shows his confused expression, emphasizing his loss of control over the situation. The scene concludes with Shadow diving downward, transitioning seamlessly into gameplay. “By having him fall slowly, we allowed players to first grasp the sudden change in the environment. I think it worked as an effective bridge,” Shibuya explained.

“Rail Canyon.” As rails duplicate and come crashing toward him, Shadow nimbly dodges them in a sequence highlighted by a 360-degree rotating camera. Eventually, he’s flung out into the distance, transitioning seamlessly into a playable running state. Since this is the second distortion space entry sequence, its length is kept shorter than the “ARK” segment.
“Cityscape.” This sequence features a distinct vertical motion, as Shadow dashes upward using fragments of a collapsed tunnel as footholds. He gracefully dodges the crumbling debris falling from above, showing that he has begun to adapt to this warped world. It ends with Shadow landing on a grind rail, but this time the world is flipped upside down, a visual twist emphasized through dynamic camera work. “There was a request for the visuals to become increasingly flashy toward the latter half, so we incorporated quick, anime-style zoom-ins and zoom-outs in the camera direction,” says Shibuya.
One of the most effective tools used in creating these scenes was the in-house developed “Sine Expression Tool.” This tool allowed for the easy application of cyclical motion to selected nodes and made it simple to add subtle shaking effects—even to rigs that didn’t originally include such features—making it highly versatile. For the “grind rail” sequence, around ten rails were animated using this tool to bring the scene to life.
The “Distortion Space Entry” sequence typically uses Vertex Animation Texture (VAT) to handle the disintegration of pathways. However, for the tunnel scene, since there was only one such instance, the team instead used the “Sine Expression Tool.” This allowed artists to easily create complex movements without relying on VAT, proving to be a convenient and effective solution for a one-off sequence.
Up to this point, we’ve explored the in-game event cutscenes, but of course, the game also features traditional cinematic sequences. Sonic Generations utilized a cartoon-style presentation, with rapid-fire dialogue and mostly fixed camera angles. In contrast, Shadow Generations adopts a more cinematic approach, using expressive gestures, subtle emotional cues, and immersive handheld-style camera work to convey deeper emotion.
Shibuya explained the reasoning behind this shift: “Shadow is a character burdened by trauma regarding his origins. We wanted to portray his inner turmoil, his struggle against corruption, and his confrontation with fate through his performance. Additionally, Maria—the heroine appearing this time—is like family to Shadow, so expressing her emotional state was also an important focus.”
When creating cutscenes, the team began by reading through the scenario and discussing the direction of the scenes. From there, they created 2D and 3D layout storyboards to visualize character movement and staging. The partner studio then handled the animatics and animation process using Maya.
The primary goal during acting was to convey Shadow’s inner conflict and the emotional exchanges between him and Maria. Since Shadow is a character of few words who doesn’t express emotions in an exaggerated way or smile easily, the performance demanded subtlety. Facial expressions played a key role in expressing emotion and thought—especially using the eyebrows and eyelids to add nuance.
Sonic characters already have eyes that take up more than half their face, making facial movement very impactful. Rather than relying on mechanical, shutter-like blinking, the team aimed for soft, expressive motions by also manipulating the eyebrows and the space between them. They didn’t settle for preset poses but instead refined each shot based on the emotional tone of the scene, avoiding symmetrical posing in favor of more dynamic, directional expressions.


In Sonic Frontiers, the pupils could not be scaled, but in Sonic × Shadow Generations, it is now possible to change the scale of the pupils. This feature is used in scenes where Shadow is consumed by Doom Power or experiences a strong shock.
Rather than using bones to control the eyes, the team opted for a method that manipulates the eye texture itself—moving and scaling it through UV scrolling.
ShadowEyeTrack Tool: When this tool is executed, it generates a locator that tracks the movement of the pupils.

To depict Shadow gradually succumbing to darkness when activating his Doom Power, the team implemented a visual effect that made his eyes glow red. Normally, attaching effects to the pupils would be simple if a bone node were present, but in this case, the pupils were not rigged with bones. Instead, the eyes were textured onto a spherical mesh and controlled via UV offset.
Since it was difficult for artists to extract the pupil’s coordinates from this UV-based setup, they requested help from a technical artist. A custom tool was created to track the UV-based movement and scaling of the pupils and output it to an external locator. This locator then served as the anchor point for attaching the glowing effect.
Beyond this, the project featured numerous technical and artistic innovations: expressive animations through finger and body movements, high-speed action choreography, dynamic cinematography, and layouts grounded in film theory. Viewers are encouraged to appreciate the final visuals as a reflection of the thoughtful and meticulous work behind them.
Beyond Remastering: Pioneering Development in Deformation Technology
When remastering Sonic Generations, the development team aimed to modernize its visual presentation. Before even starting the project, they adopted the motto “character expressions like never seen before” and explored various avenues of research and development. One example of this was the pursuit of deformation techniques not reliant on bones.


This was a custom vertex shader designed to produce identical deformations in both Maya and the game engine. It could be layered on top of standard bone-based deformation, enabling effects such as squash and stretch or even transforming the entire character into a spiral shape.
A spherical primitive controller was applied to the mesh, allowing the specification of intensity, area of influence, and deformation types like “wave.” First, the Technical Artists created the shaders for both Maya and UE5. Then, the artists tested and refined the expressions through animation prototyping before handing it over to the programmers for implementation into the proprietary game engine.
By enabling artists and TAs to build the prototype environment together, the team was able to experiment freely and efficiently. “Maya’s high level of customizability allowed us, as artists, to drive a wide range of visual expressions. It really showed how versatile the tool can be,” said Lead Cutscene Artist Koichi Shibuya.

And so, while we’ve explored the development process behind this deformation shader technology, it was ultimately decided not to implement it in Sonic × Shadow Generations. This was due in part to the use of different game engines between the two components of the title: Sonic Generations uses SEGA’s proprietary Hedgehog Engine 1, while Shadow Generations runs on Hedgehog Engine 2. Additionally, fan demand leaned heavily toward a faithful HD remaster of the original, which influenced the final decision.
Although the feature wasn’t realized on current-gen consoles, the groundwork laid through these exploratory efforts and visual experiments will undoubtedly feed into future projects. This glimpse into advanced visual techniques already hints at exciting possibilities for the next installment.


User Experience in Maya
Lastly, the artists shared their thoughts on the user experience in Maya.
Shinji Matsuura, a lead character artist active at the forefront in the design section, has been a Maya user for about a quarter of a century since his student days. “The advantage of Maya is that it allows you to do everything from modeling to rigging, animation, and rendering within a single piece of software. I think it’s a good idea for beginners to first try using it, get a broad understanding of the workflow, and then find the area they want to specialize in,” he advised. He continued, “One of Maya’s strengths is that all operations are recorded in the log as MEL scripts, so when repeating the same task, you can easily execute it again by copy-pasting. It can be used like a macro, and I feel it’s a tool where scripting is very easy to implement.”
Shugo Goda, the lead animator in the animation section, said, “Of course, Maya offers the basic and user-friendly functions needed to start working in 3D, but its major advantage is how easy it is to develop tools using MEL or Python, allowing customization to fit projects or teams. For this title as well, we created and customized in-house tools specifically for animation work. Another appealing point is the large user base and how easy it is to find tips and information.”
Koichi Shibuya, the lead cutscene artist in the event section, cited the stability of Maya’s reference functionality as a highlight. “It’s common to work without final models in place, so being able to swap them in later is incredibly helpful. The Sine Expression tool allowed us to test complex movements relatively easily. By applying sine expressions to tunnel fragments and rails, it made trying out different variations of movement and doing trial and error very straightforward,” he said.
Finally, Keiichi Umatate, the senior art director, shared his perspective: “When doing art direction, I sometimes take a mechanical design and render it in 3D to use as a reference image. Maya has a long history, a wealth of documentation, and a well-established support system. I hope it continues to be the standard DCC tool moving forward.”


TEXT: Akiyoshi Hizume
EDIT: SEGA, Autodesk
Source: Autodesk Japan Blog
Discover more from Sonic City ⋆★ Sonic the Hedgehog News, Media, & Community ★⋆
Subscribe to get the latest posts sent to your email.